I ran into our local farm and home store to buy a bag of dog food for our well-fed overweight, four legged family member. To my delight, there was a large display of seed potatoes, onion sets, garlic, seeds, soil, garden hoses, starter fertilizer, etc. Gardening season is quickly approaching in my zone! Without any planning, I gave into the impulse and bought what I thought I would need to get started. I could not resist and bought far more than I needed (also had forgotten what I had already bought from the seed catalog). I think my solution will be to expand the garden or give my extras to the neighbors.
I brought the goods home, and my five-year-old ran out to the garage to get her gardening gloves on. “Hold on a minute”- I curbed her enthusiasm and told her I was not ready to begin digging in the garden. I explained that it was still too cold to plant in the garden, but we could give our garden a jump-start by starting some seeds in the house as we did last year. (Last year’s post: Seeds, Seeds, Everywhere.)
If you would like to get a jump-start on your gardening, let me be the one to encourage you to get started. Do not be intimidated by starting seeds early, it is not difficult. I think every elementary kid in the US has planted a bean seed in a Styrofoam cup and sprouted the seed in the windowsill of their classroom. This is an activity that you can do with your kids, grandkids, neighbors, 4-H club, or with a classroom of students. I think there is a lot of bonding when everyone has dirty hands. Just know going into it, clean-up will be necessary.
Start your seeds indoors 4 to 12 weeks before the last spring frost. Read the seed package label for advice on when to start your seedlings indoors. Let me caution you on starting your seeds to early and trying to keep them alive in your house, until they are ready to go into the garden. Often times, they become tall and spindly and will not do well in the garden. Look at the time recommended on the seed package and refer to your garden calendar and start them at the right time.
I took a picture journal of our seed starting adventure. This year we are using trays with planting cells. There are many different ways to start seeds, and I am going to show you a different method than I blogged about last year. You can use any type of container that will hold two to three inches of soil and that will drain. It is easy to add drain holes to containers that don’t have any drainage.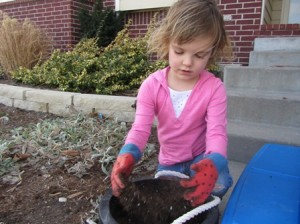
- We started by taking advantage of a gorgeous February day and set up outside on our kiddy picnic table. We found a bucket and put our soil in the bucket. To start seeds you should not use soil from your garden. Purchase a soilless mix, also referred to as potting soil, to start your seeds in. It is light and fluffy and the best choice for your seeds.
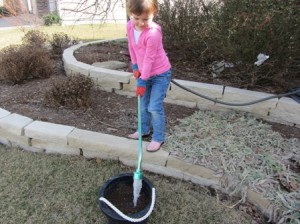
- Next, we added water to the bucket and soil. It is important to mix the soil with water before putting it in the tray. If you fill the tray with soil and then add water, the water just sits on the top and very slowly absorbs. When you mix it prior to adding the soil to the tray, you know that the water is distributed evenly throughout.
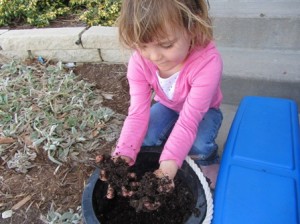
- Put your hands in the bucket and mix it up. I like to take large handfuls and squeeze the water into the soil. It feels spongy. If all of the soil is wet and there is extra water, make sure to dump the water out of the bucket. You want the soil moist not overly wet.
- Fill each individual growing cell with soil. Level it off so it is nice and even.
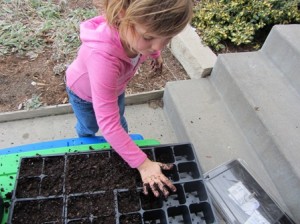
- Pick your favorite flower or vegetable seed. If this is your first experience with seed starting, I would start with two or three different varieties of plants. Some easy seeds to start are zinnias, marigolds, peppers, and tomatoes. These seeds are larger and easier for little hands to help with.
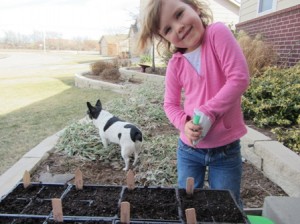
- Time to plant the seeds. Read the seed package; it will tell you the planting depth. This is essential for success! You can poke a hole and sink the seed into the hole. I have a master gardener friend who suggests placing the seed on the soil surface and then applying the extra soil on top. We put two seeds in each cell.
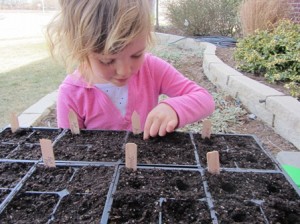
- Now, you have to cover the seeds with a clear lid, plastic wrap, or a plastic bag. Seeds need humidity to germinate; and by enclosing the container, you keep the moisture in. This is a great lesson on the water cycle. If you use plastic wrap or a plastic bag make sure there is adequate air space for the seedling as it emerges from the soil. You can prop up the plastic with sticks.
- The best temperature for seeds to sprout and emerge is between 65-75 degrees. I place our seeds in the window of our south facing, sliding glass door. A south window is perfect for starting seeds, because the warmth of the sun will help warm up the soil. If you do not have a south facing window, you may have to invest in a grow light.
- Watch your soil everyday! Once the seeds begin to germinate and develop the first set of leaves, remove the cover. My girls look at the seeds everyday and somehow get the lid off. Ugh! What is a mom to do? I’m glad they anticipate germination but they are also slowing down the process by letting the moisture out. If this happens to you and the soil looks dry, use a spray bottle to moisten the soil.
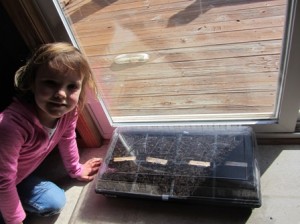
This concludes Starting Seeds Part One. So what do you think? Simple enough, right? I know you can do it. Once our seeds have sprouted, I will show you how I plan to keep them alive and growing for planting in our garden. Stay tuned…


